Over The Rainbow - Saturday Spark
- Trisha McKinney

- May 7, 2021
- 4 min read
Updated: May 18, 2023
This post contains affiliate links for your shopping convenience. Click here to read my full disclosure policy

What a week my friends, what a week! It was a little overwhelming at times but it's Friday and here I am able to share my weekend project with you.
My brother purchased his first home, a fixer-upper beach cottage, a few years back. He has been pouring a ton of time, money, and energy into it over the last several years {DIY runs in the blood} with the help of my dad and some of his friends. He gutted the kitchen, sanded and stained the hardwood floors, built a deck the list goes on and on. All things to get the home comfortable and livable but he hasn't been able to spend much time on the three bedrooms. So I offered to help and started with my niece's room.
Here is my mood board and my vision


Day one: Prep and Paint.
It was only the top portion of the wall that was going to be white so with the help of my mom, we applied two coats of Sherwin Williams, Pure White about 3/4 of the way down the wall.


After the two coats of paint dried, I measured the first line 37" from the floor and did this about every 4" around the entire room. By doing this I was able to get a straight tape line. I then measured 39" from the floor for the top line and followed the same process to get the straight line.
The top tape line was to ensure the line around the room was straight and the bottom tape line was to provide that solid white line running around the room.


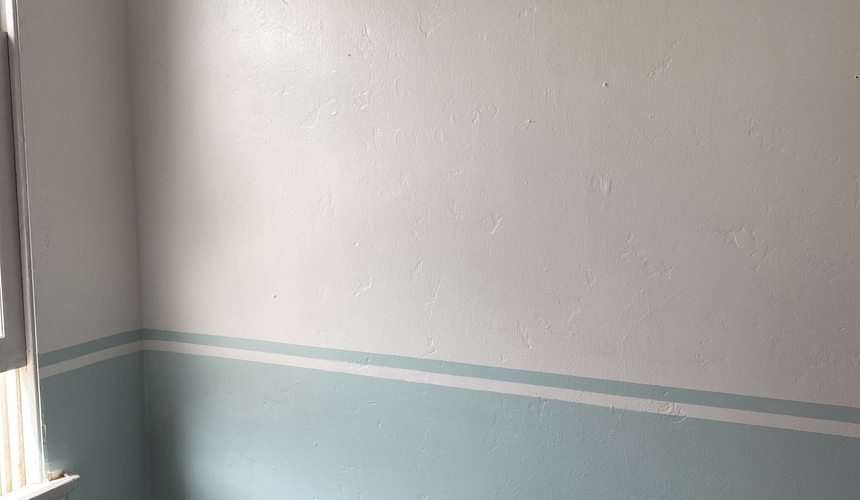


Next came the bottom portion of the wall I chose this pretty shade of blue from Sherwin Williams, Tidewater. I painted everything from in between the two tape lines and below. While the paint was still wet {and holding my breath} I removed the frog tape revealing two pretty solid straight lines...{exhale}. Frog Tape for the win! I went in with a small art brush to fix some very small and minor imperfections.
Day Two: Scallop Detail, Trim & Baseboard
Started by making a template that I could trace around the perimeter of the room with manila file folders and a cereal bowl.


Here is a quick video tutorial for your viewing pleasure 😉
Once the template was made I taped the perimeter of the room measuring 2" from the ceiling. I followed the same method as above with the blue paint to ensure a straight line. Next, I traced the scallop template around the entire room, painted the border {everything above the tape to the ceiling} with Sherwin Williams Coral Perfection. After the second coat, I removed the tape.


Using art paint brushes went around each scallop outline and then filled them in with a larger paintbrush. This part was the longest and most tedious, but so worth it! You can see in the video below how I achieved the look. I did have to go around a couple of times to ensure all the pencil lines were covered and to make the lines a precise as possible.

Day two was complete. All that remained was the decor and staging for my niece.
She wasn't going to be home until Wednesday so I headed back over to my brother's house on Tuesday after work and my root canal to get her room back in order.
I'm still waiting on a few more items to come in next week like her rug and some storage items but it's pretty much complete. Take a scroll through the photo gallery below and let me know what you think.


my brother got my niece's reaction on video and it was the most precious thing ever! She Facetimed me to say Thank You and she said her favorite part was the rainbow. Which, BTW, was printable from an Etsy shop, I had it printed at Staples {poster pize} and the frames I picked up at Michael's BOGO!


Wishing you days full of sunshine & rainbows friends! Thanks for stopping by!

If you like what you've read and think other might too, please share!

Sharing some inspo from the last Saturday Spark Party
Boho Inspired Family Room

I of course have to share Tanya's Fresh boho style family room update. At the very least in the spirit of room updates, right?
But honestly, she has some great tips and design elements that I cannot get enough of and I love her humor sprinkled throughout her blog.
Head on over to her blog twelve o eight for more of her DIY and design ideas.
Green Distressed Cabinet

Last week I shared a Trash To Treasure, I love saving items with good bones or design elements and bringing them back to life or a new purpose.
This is why I just love this chippy green side table/cabinet shared by Junk is My Life. So many fun upcyles on this blog, one worth checking out for more inspiration.


Comments